Room-by-Room Babyproofing Checklist: Safe Steps Plan
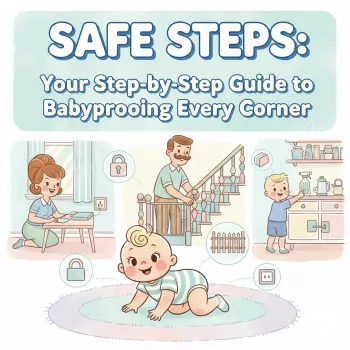
Safe Steps: A Room-by-Room Babyproofing Plan You Can Print and Follow
Babyproofing is easiest when it’s broken into small, repeatable steps: handle the biggest hazards first, then work room by room with a consistent standard. The goal isn’t perfection—it’s reducing the most serious risks (falls, burns, poisoning, drowning, and strangulation) while keeping your home functional for real life. Use the plan below as a practical sequence, and keep a checklist handy so progress stays visible and stress stays low.
Before You Start: A Quick Safety Walkthrough
Start with a crawl-level scan. Get down to baby height and move through each space to spot what’s reachable: dangling cords, blind strings, tablecloths, sharp edges, unstable décor, and small objects that could become choking hazards. Then prioritize what can cause severe injury quickly—stairs, tip-overs, hot surfaces/liquids, accessible medications/chemicals, and standing water.
Set one simple standard and apply it everywhere: anything within reach gets secured, removed, covered, locked, or anchored. If you need a timeline, finish high-risk zones first (kitchen, bathroom, stairs), then move on to lower-risk areas like an office or guest room. For broader safety guidance, see the American Academy of Pediatrics home safety tips.
High-Priority Hazards to Address First
| Hazard | Where it shows up | Fast fix |
|---|---|---|
| Unanchored furniture/TVs | Living room, nursery, bedrooms | Anchor to studs with anti-tip straps |
| Stairs and level changes | Hallways, split-level rooms | Install hardware-mounted gates |
| Accessible cleaning products/meds | Kitchen, bathroom, laundry | Lock cabinets; store up high in a latched container |
| Hot liquids and surfaces | Kitchen, dining area | Back-burner cooking; turn pot handles inward; use stove knob covers |
| Cords and blind strings | Living room, bedrooms | Shorten/secure cords; use cordless window coverings or cleats |
Step-by-Step Whole-Home Setup
When babyproofing feels overwhelming, use a single sequence in every room:
- Anchor: Secure dressers, bookcases, and TVs first. Avoid placing tempting items (remotes, toys) on top of furniture where climbing starts.
- Block: Add gates at stairs and restrict access to high-risk rooms. Use hardware-mounted gates at the top of stairs for stability.
- Lock: Install cabinet/drawer locks anywhere chemicals, sharp tools, batteries, or choking hazards are stored.
- Cover: Use outlet covers on reachable outlets; add corner/edge guards where falls are likely.
- Contain: Create a safe “yes space” with a play yard or gated zone for quick hands-free moments.
- Maintain: Do a weekly floor sweep for small items (coins, caps, magnets), and a monthly check of anchors and latches.
For tip-over prevention specifics, the CPSC’s Anchor It! guidance is a strong reference point.
Living Room & Family Areas
- Anchor TV stands and tall furniture; confirm straps are tight and attached to studs or solid backing.
- Pad sharp corners on coffee tables and hearth edges; remove wobbly side tables that tip easily.
- Route lamp/charging cords behind furniture, use cord shorteners, and keep power strips out of reach.
- Clear low shelves of choking hazards (coins, pen caps, button batteries). Store remotes and controllers higher up.
- If there’s a fireplace, use a sturdy guard and keep tools and lighters locked away.
Kitchen: Burns, Cuts, and Chemicals
- Install stove knob covers (or remove knobs if possible) and use back burners when cooking.
- Add latches to cabinets with cleaners, detergents, alcohol, and dishwasher pods; keep dish soap and sponges out of reach.
- Lock drawers with knives, peelers, scissors, and matches; consider moving sharp tools to upper cabinets.
- Use a fridge lock if needed; keep magnets and small items off the fridge so they don’t drop to the floor.
- Set hot-drink rules: no hot liquids while carrying baby; keep mugs away from edges and skip tablecloths that can be pulled.
Bathroom & Laundry: Water, Medications, and Laundry Pods
- Keep toilet lids closed and consider a toilet lock; never leave water standing in tubs or buckets.
- Lock up medications, vitamins, cosmetics, and essential oils—high storage plus a latch is best.
- Set water heater temperature to reduce scald risk; test bath water every time.
- Store razors, nail tools, and hair appliances unplugged and out of reach; manage cords to prevent pulling.
- Keep laundry detergent and pods locked away; treat pods as a high-risk item.
For additional injury-prevention fundamentals, the CDC child safety resources provide helpful overviews.
Nursery & Bedrooms: Sleep Space and Furniture Safety
Stairs, Hallways, and Doors
Windows, Blinds, and Balcony/Patio Risks
Printable Plan: A Simple Weekly Babyproofing Routine
A Printable Guide That Keeps Everything Organized
A room-by-room checklist helps catch easy-to-miss hazards (like a charging cord behind the couch or a low drawer full of batteries) and keeps progress consistent across caregivers. If you want a ready-to-print, structured plan, Safe Steps: Your Step-by-Step Guide to Babyproofing Every Corner (printable digital download) is designed for quick check-offs, reprints after rearranging, and ongoing re-checks as your child’s skills change.
For families juggling disrupted nights while tackling home safety projects, AI-Powered Checklist for Better Sleep Adventures (digital guide) can be a useful add-on for building calmer bedtime routines during busy seasons.
FAQ
When should babyproofing start?
Start during pregnancy or by about 3–4 months, and finish high-risk areas before crawling begins. Re-check regularly, because new skills (pulling up, cruising, climbing) change what’s “within reach” fast.
Do outlet covers really help?
Tamper-resistant (TR) outlets are ideal, but outlet covers add a helpful layer for outlets that are easy to access. They work best alongside good cord management and active supervision.
What are the most important things to babyproof first?
Prioritize anchoring furniture/TVs, installing stair gates, locking up poisons and medications, preventing kitchen burns, and reducing drowning risk in bathrooms and laundry areas. Those steps address the hazards most likely to cause severe injury.









Leave a comment