200/2400mm Telescope Guide: Best Targets and Setup Tips
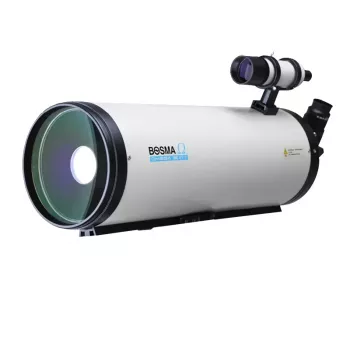
200/2400mm High-Power Astronomical Telescope: What It’s Best At and How to Use It Well
A long-focal-length telescope in the 200/2400mm class is built for magnified, detail-focused observing—especially the Moon, planets, and compact deep-sky targets. With the right expectations and a few habits that improve steadiness and sharpness, this style of scope can deliver rewarding views from the very first week.
What “200/2400mm” typically means for observing
When a telescope is labeled “200/2400mm,” it usually describes two core specs that shape what you’ll see at the eyepiece.
- Aperture (200mm) is the diameter of the main light-gathering optics. A 200mm aperture can resolve fine detail on bright targets (like planetary cloud bands and lunar crater edges) and also brings smaller, brighter deep-sky objects into better reach than smaller apertures.
- Focal length (2400mm) sets the image scale. A longer focal length makes it easier to reach useful magnifications with common eyepieces, and many eyepieces behave more cleanly near the edge of the field at longer focal ratios (though the exact feel depends on the telescope’s optical design).
- Long focal ratio advantages often include a more relaxed experience at higher power and (in many designs) a bit more tolerance for tiny collimation errors than very “fast” systems.
- Atmospheric steadiness (“seeing”) is the real gatekeeper for high-power viewing. Even excellent optics can’t overpower turbulent air.
What this style of telescope excels at
The Moon
The Moon is the perfect match for a 200/2400mm-class telescope: it’s bright, detailed, and forgiving. Expect crisp crater rims, sharp mountain shadows along the terminator, and—on steady nights—subtle rilles and fine texture on lava plains.
Planets
High magnification is where long focal length shines, especially on the bright gas giants. With good seeing and proper cooldown, Jupiter can show multiple cloud bands, festoons, and moon transits; Saturn’s rings and Cassini Division become easier to study; and Mars can reveal surface shading near opposition (though Mars is especially sensitive to seeing).
Double stars
Splitting tight double stars is a classic use case. The combination of aperture (resolution) and high-power friendliness makes it easier to detect clean separations and diffraction patterns—when the air is steady and focus is nailed.
Smaller, brighter deep-sky objects
Globular clusters, planetary nebulae, and brighter galaxies can look impressive, particularly from darker skies. The tradeoff is field of view: very large nebulae and sprawling star fields are often less convenient in long-focal-length systems.
Magnification that makes sense (and when it doesn’t)
Magnification is straightforward to calculate:
Magnification = telescope focal length ÷ eyepiece focal length (so 2400mm ÷ 12mm ≈ 200×).
What matters more than the number is whether the view stays crisp. If the image looks soft, watery, or constantly shimmering, the atmosphere (or the telescope’s temperature) is limiting you. In those moments, backing down in power often reveals more detail because contrast improves and the target stops “boiling.”
Example magnifications for a 2400mm focal-length telescope
| Eyepiece focal length | Approx. magnification | Best use cases |
|---|---|---|
| 30mm | 80× | Finding targets, larger star clusters, lunar scanning |
| 20mm | 120× | General viewing, bright deep-sky, initial planetary look |
| 12mm | 200× | Lunar detail, Jupiter/Saturn on steady nights |
| 8mm | 300× | High-detail lunar/planetary when seeing is excellent |
A reliable routine is to start low for centering and focusing, then step up gradually only if the image supports it.
Setup for steadier views: mount, balance, and vibration control
At 200× and above, tiny shakes become dramatic. A stable mount and tripod matter just as much as the telescope itself.
Cooling, collimation, and focus: the “sharpness trio”
What to observe first: a simple target plan for the first week
For planning and sky orientation, tools like Stellarium Web are excellent. For deeper observing guides and seasonal target lists, Sky & Telescope’s observing resources are a long-standing reference, and NASA Solar System Exploration is a solid source for planet facts and current missions.
A practical look at the 200/2400mm High-Power Astronomical Telescope
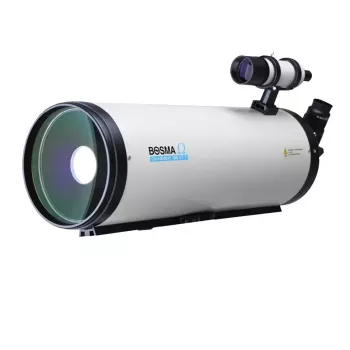
The 200/2400mm High-Power Astronomical Telescope for Stargazing Enthusiasts is built around a 200mm aperture and 2400mm focal length—an approach that favors magnified, detail-rich observing of the Moon, planets, and other compact targets. For best results, pair it with a stable mount and a small eyepiece set that covers low, medium, and high power so you can match magnification to the night’s conditions.
If you like longer sessions outdoors, comfortable gear can make a difference as temperatures shift. A lightweight layer like the Men’s Quick-Dry Short Sleeve Sports Shirt – Lightweight Workout & Running Top can be handy for setup and warm-weather observing. And for winding down after late nights under the sky, the AI-Powered Checklist for Better Sleep Adventures | Digital Sleep Guide for Relaxation, Lucid Dreaming & ai suggestions for better dreams offers a structured, screen-light way to reset your routine.
FAQ
Is a 200/2400mm telescope better for planets or deep-sky objects?
It’s typically better for the Moon, planets, double stars, and compact bright deep-sky targets. Very wide-field views (large nebulae and expansive star fields) are usually less convenient, and deep-sky performance still depends heavily on sky darkness.
What magnification should be used on Jupiter and Saturn?
A practical range is often about 120× to 250×, depending on atmospheric seeing and how well the telescope has cooled. Start lower, then increase gradually; if the image turns soft or shimmery, drop back down.
Why does the image look blurry even at lower power?
Common causes include insufficient cooldown time, poor seeing, dew forming on optics, or slightly missed focus. If the telescope design requires collimation, even a small misalignment can reduce sharpness, so a quick check can help.









Leave a comment